UI/UX Design

UI/UX (User Interface/User Experience) design is a crucial aspect of creating digital products, such as websites, mobile applications, and software platforms. While often used together, UI and UX focus on different parts of the design process, though they work in tandem to ensure a product is both visually appealing and easy to use. Here’s an in-depth look at UI/UX design, their roles, principles, and how they contribute to overall product success.1. What is UX (User Experience) Design?

User Experience (UX) Design focuses on the overall interaction between users and a product. UX encompasses everything that impacts how a user feels when using a product, including usability, accessibility, and the efficiency of navigating through the product. It’s about making sure users achieve their goals effectively and with satisfaction.a) Core Aspects of UX Design

User Research: Understanding the target audience, their behaviors, needs, and pain points. This involves conducting interviews, surveys, user personas, and journey maps to gather insights.

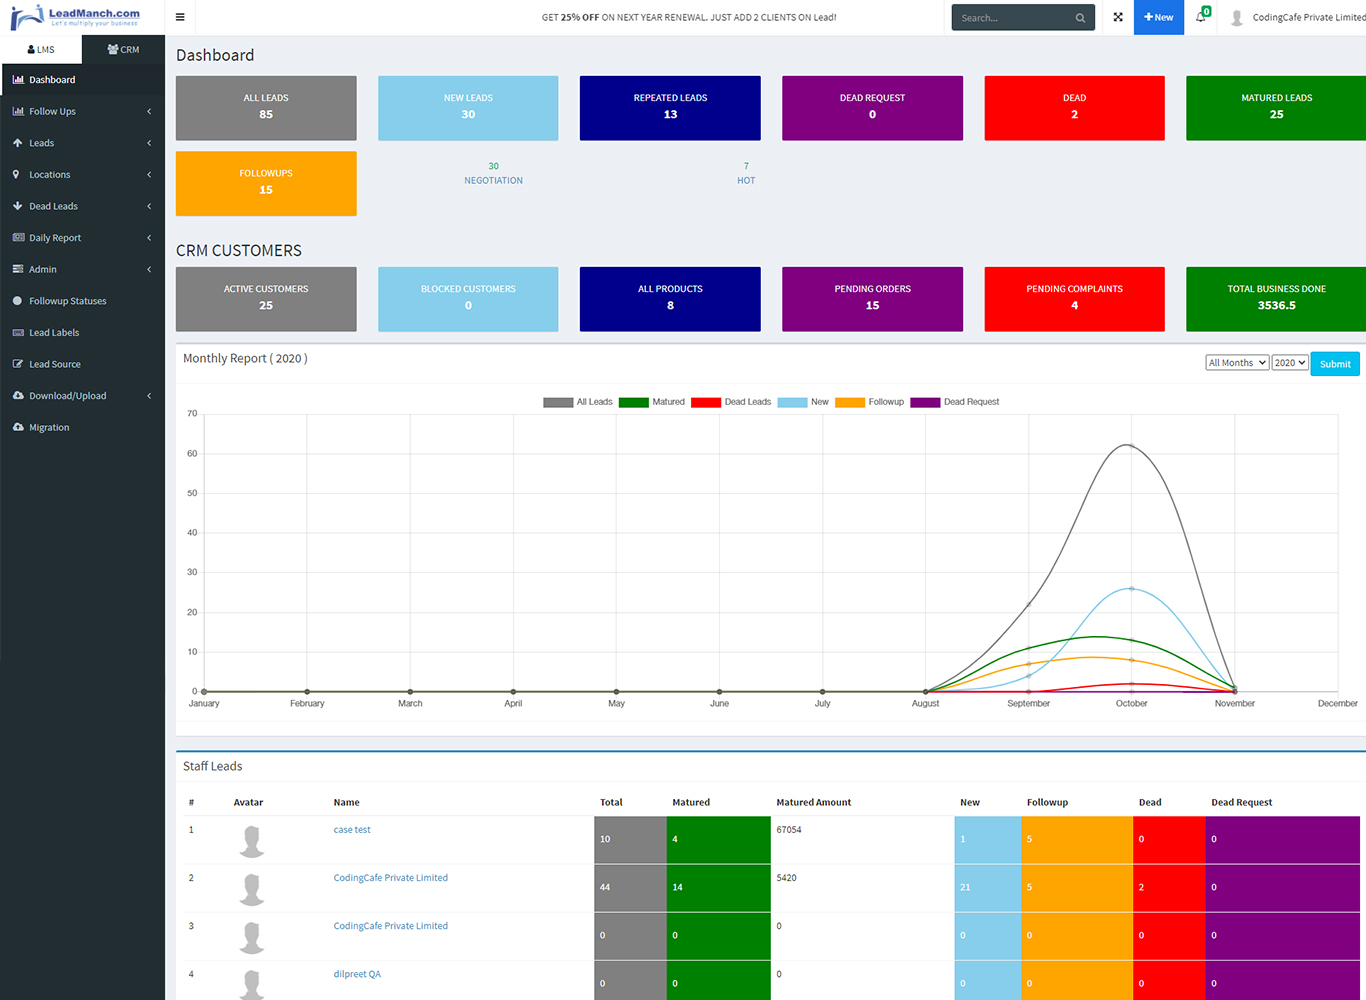
Information Architecture: Structuring and organizing the content so that it’s easy for users to find and navigate. This involves creating sitemaps, content hierarchies, and taxonomy.

Wireframing and Prototyping: Creating low-fidelity (simple) wireframes to outline the basic layout and functionality of a product. Prototyping adds interactions to show how users navigate between different pages or screens.

User Testing: Conducting usability tests to ensure the design meets user expectations and provides a seamless experience. Feedback is collected through A/B testing, user observations, and metrics.

User Flow: Mapping out how a user interacts with the product, from the first touchpoint to completing a goal. User flow focuses on ensuring smooth, logical navigation throughout the product.

b) The UX Design Process

Step 1: Research & DiscoveryConduct user research to understand user needs and behaviors.

Study the business goals and market competition to align the product with user expectations.

Step 2: Define User Personas & User JourneysDevelop user personas based on research to represent different types of users.

Create user journey maps that outline how different personas interact with the product over time.

Step 3: Information ArchitecturePlan how the information will be structured by creating a site map or navigation flowchart.

Decide on the hierarchy of content, organizing pages, and categorizing data for easy navigation.

Step 4: WireframingDesign low-fidelity wireframes that layout key elements of the interface. Focus on function over aesthetics.

Wireframes provide a clear view of how users will interact with the product, defining structure and placement of features without design elements like colors or fonts.

Step 5: Prototyping

Convert wireframes into interactive prototypes that simulate the actual user interaction with the product. This can be done using tools like Figma, Adobe XD, or InVision.

Step 6: Usability Testing

Test the prototype with real users to identify pain points, navigation issues, or areas for improvement.
A/B Testing: Compare two different versions of a page or feature to see which performs better in terms of user engagement and conversion rates.

2. What is UI (User Interface) Design?
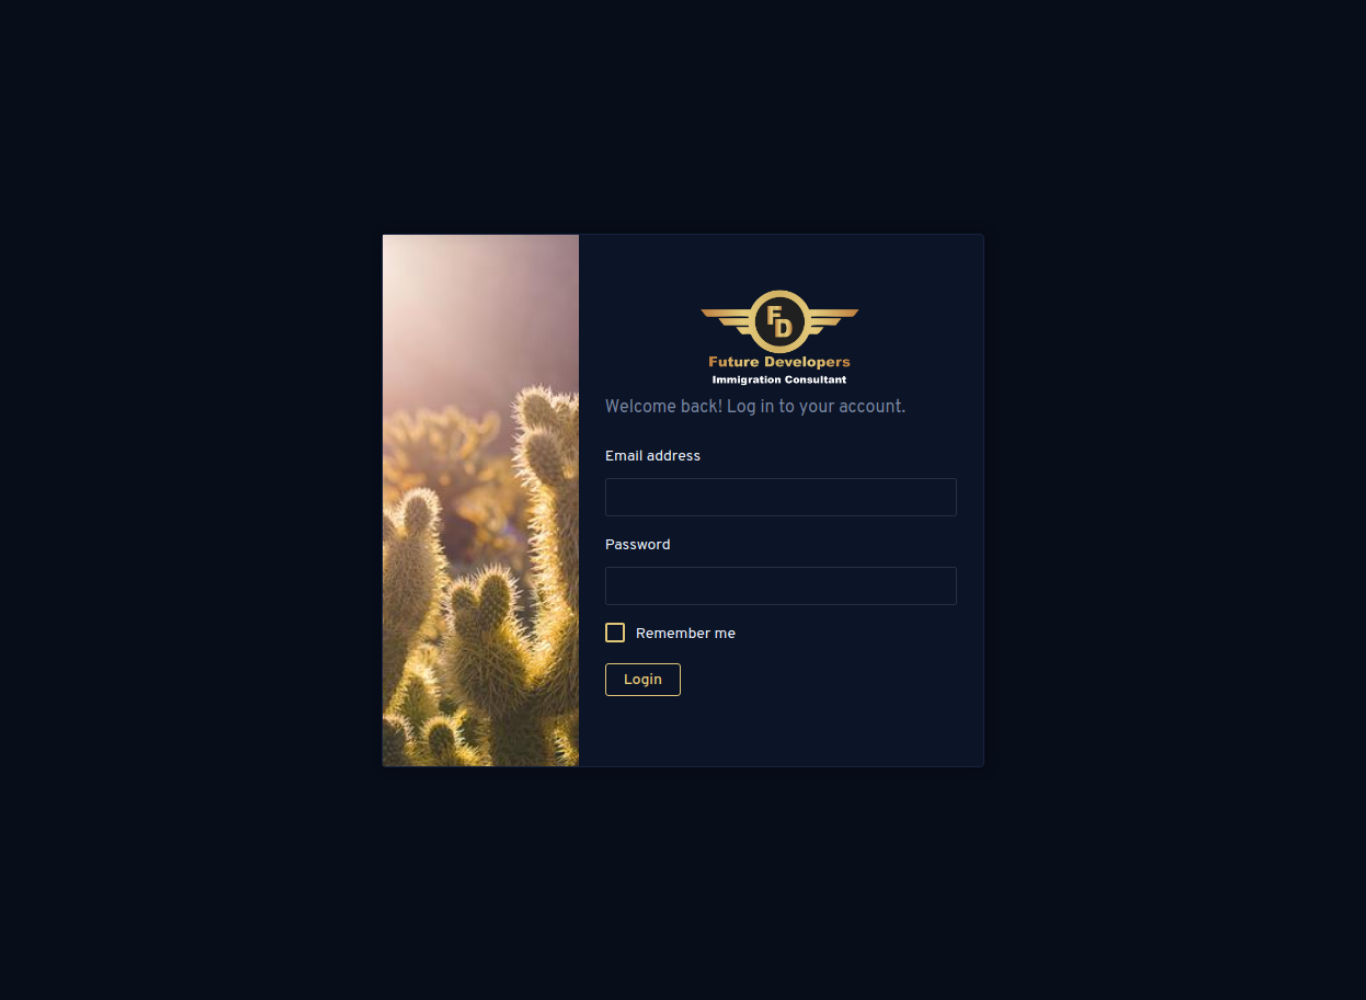
User Interface (UI) Design focuses on the visual aspects of the product. It’s about designing all the screens a user interacts with and ensuring that the design elements (colors, typography, buttons, icons, etc.) are both aesthetically pleasing and functionally aligned with the user’s needs.

a) Core Aspects of UI Design
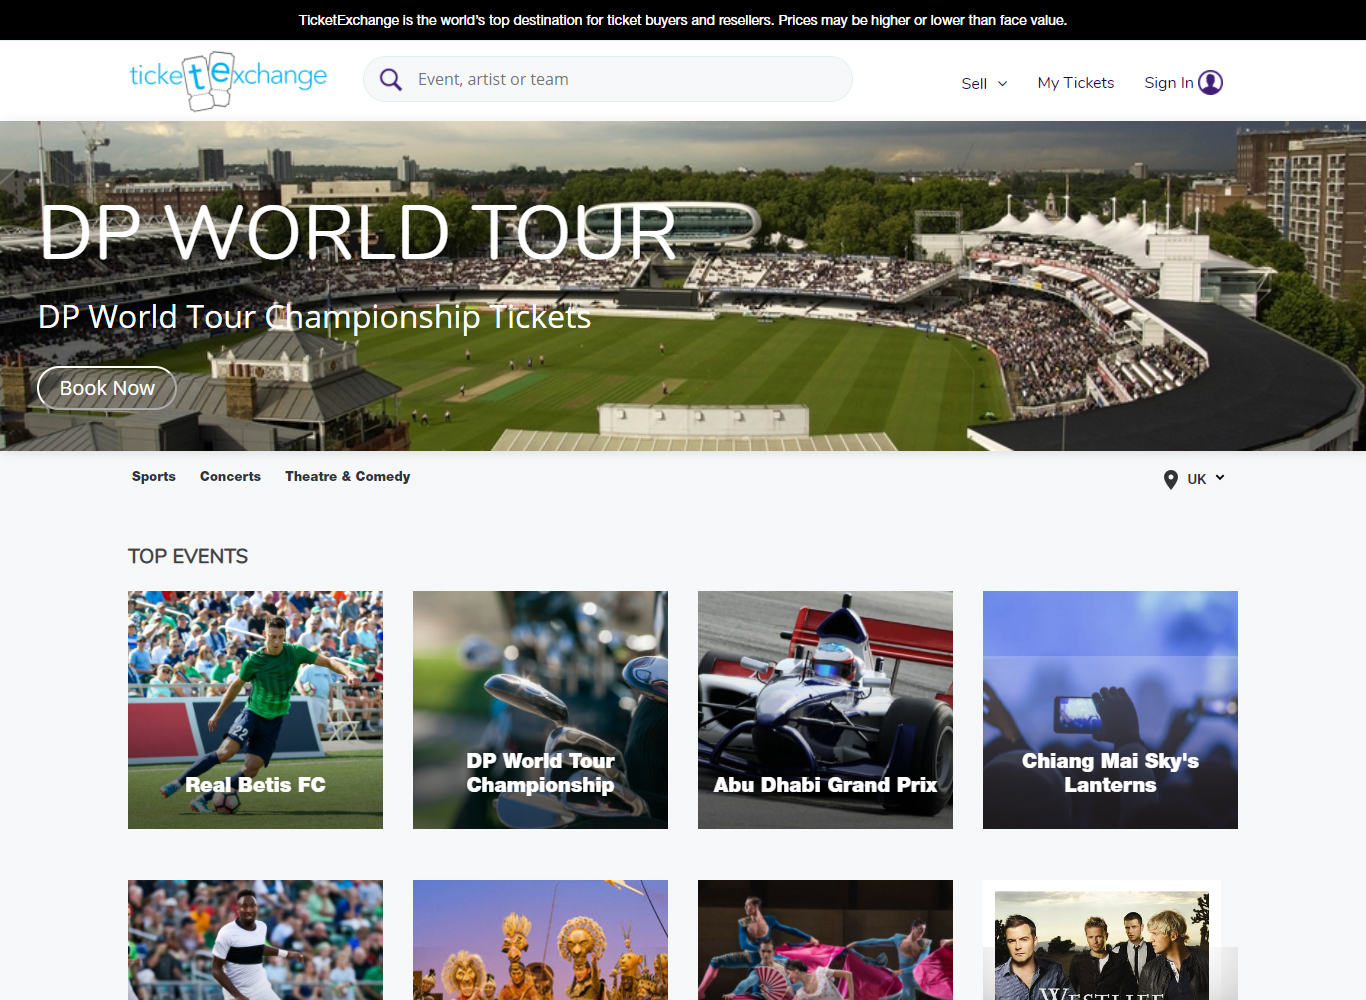
Visual Design: Ensuring that the design is visually appealing while staying consistent with branding guidelines. This includes choosing color schemes, typography, and imagery.
Interaction Design: Designing interactive elements like buttons, sliders, forms, and navigation menus, ensuring they are easy to use and responsive to user inputs.
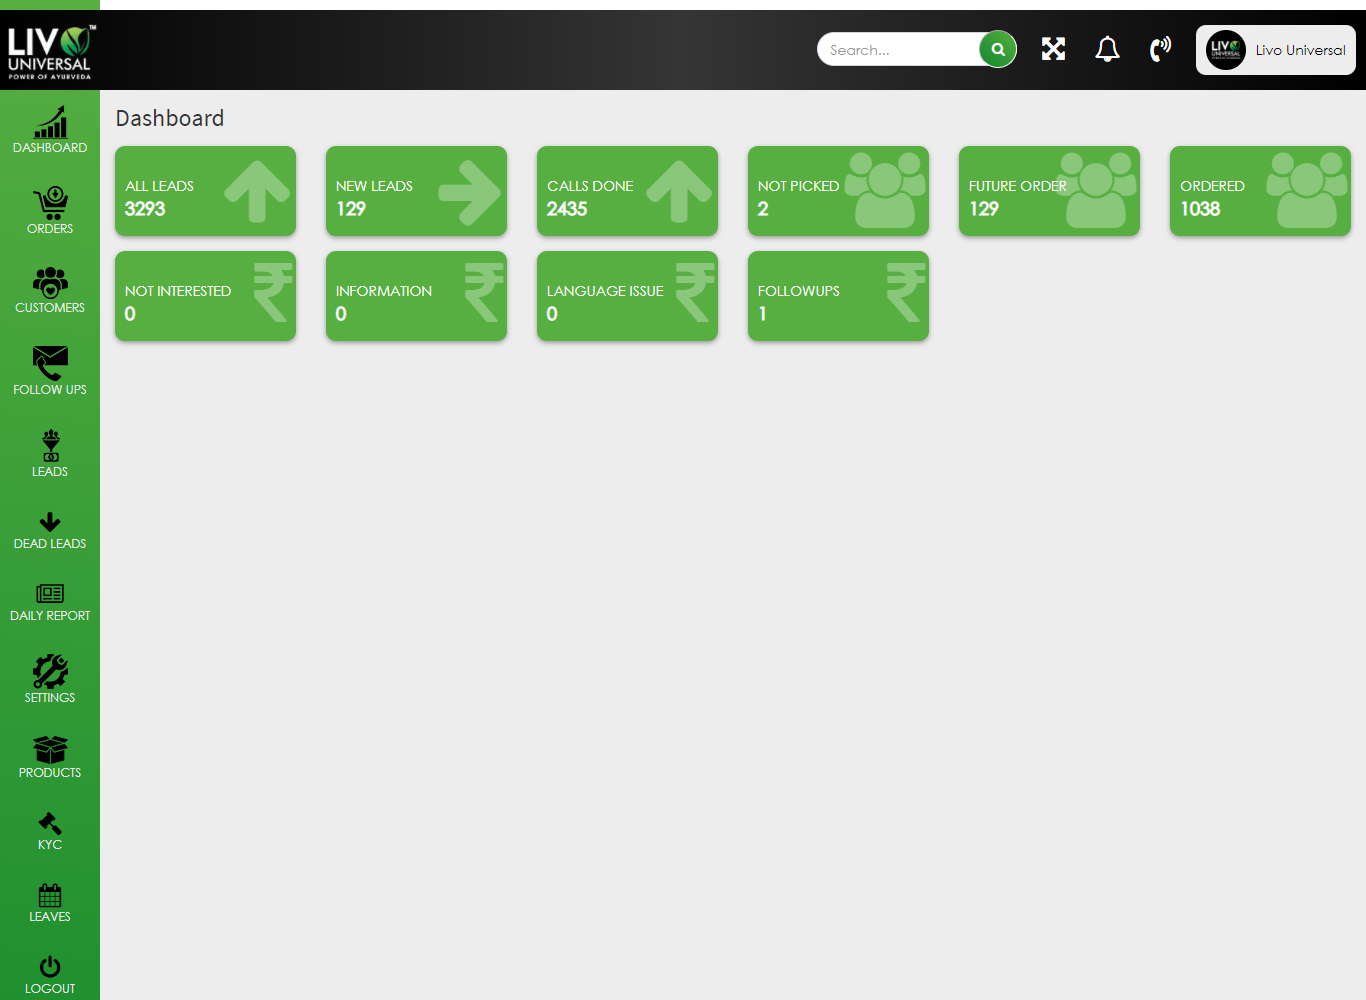
Consistency: UI design ensures consistency in layout, colors, fonts, and spacing across the product. This helps users understand and predict how to interact with the interface.
Responsiveness and Accessibility: Designing interfaces that work across different devices (desktop, tablet, mobile) and ensuring the design is accessible to all users, including those with disabilities.
Micro-Interactions: These are subtle animations or visual feedback, such as hover effects, loading animations, or transition effects, which make the UI feel more interactive and engaging.

b) The UI Design Process

Step 1: Defining the Brand Identity

Understand the company’s branding guidelines, including logo design, colors, typography, and overall visual style. Ensure that the UI aligns with the brand identity.
Step 2: Visual Style Development

Develop a style guide that outlines the visual rules for the design, including color palette, typography (fonts, sizes, weights), and design components (buttons, forms, icons, etc.).
Step 3: Mockups and High-Fidelity Design

After wireframing, transform the low-fidelity layout into a high-fidelity design with actual colors, fonts, images, and detailed interactive elements.
Step 4: Interactive Elements and Micro-Interactions

Add interactive design elements to the UI. This includes hover states, transitions, and animations that provide visual feedback when a user interacts with buttons, links, or form fields.
Step 5: Responsive Design

Ensure that the UI works seamlessly across all devices (desktop, tablet, and mobile). Use responsive design principles to create layouts that adapt to different screen sizes without losing functionality or aesthetics.
Step 6: Handoff to Developers

Collaborate with developers to ensure that the visual design is implemented accurately. Tools like Figma or Zeplin allow UI designers to provide CSS snippets, fonts, and measurements to streamline the handoff process.


    Let's Connect! How can we assist you today?


    Allowed Type(s): .png, .jpg, .jpeg .pdf, .doc, .docx


    Website design in Figma refers to using the Figma design tool to create user interfaces (UI) and user experiences (UX) for websites. Figma is a web-based vector graphics editor and prototyping tool, known for its powerful collaboration features, intuitive interface, and real-time collaboration capabilities. It allows designers to work together on the same file, share feedback, and make live edits, making it a popular tool for website design.

    Here’s an in-depth look at designing a website using Figma:

    1. Introduction to Figma for Web Design
    Figma is primarily used for designing websites, apps, and other digital interfaces. It operates entirely in the cloud, which means you can work from anywhere with a browser and internet connection. It supports vector editing, prototyping, and developer handoff features, which makes it highly versatile for creating website designs.

    Key Features of Figma:
    Collaborative Design: Multiple users can work on the same file in real time, making it ideal for teams.
    Prototyping: You can link UI elements to simulate navigation and flow, making it easier to communicate design ideas.
    Components and Reusability: Design reusable elements that can be modified centrally (e.g., buttons, icons).
    Responsive Design: Design websites for different screen sizes (mobile, tablet, desktop) using auto-layout and constraints.
    Developer Handoff: Figma provides CSS code snippets, measurements, and assets that developers can use to implement the design.

    2. Steps in Designing a Website with Figma

    a) Research and Planning
    Before jumping into Figma, thorough planning and research are crucial:

    Understanding the Client’s Needs: What type of website is being designed (e-commerce, portfolio, blog)? What’s the target audience?
    Competitor Analysis: Look at similar websites to understand the industry standard and get inspiration.
    User Persona Development: Identify the potential users of the website and their needs.
    Wireframing: Create a rough layout of the website using basic shapes to show where elements will be placed on each page (low-fidelity wireframe).

    b) Creating a Figma File Structure
    Start by organizing your Figma workspace:

    Pages: Figma allows you to create multiple pages within a single file (e.g., Home Page, Product Page, Contact Page). Organize each page accordingly.
    Frames: Frames in Figma are like artboards. Each frame can represent different screen sizes, such as desktop, tablet, and mobile.
    Layers: Figma has a layers panel similar to Photoshop or Sketch, where you can organize all your design elements.
    Naming Convention: Use proper naming conventions for layers and groups to keep everything organized and easy to manage.

    c) Designing the Layout
    Designing the layout involves setting up the structure of the website, including header, footer, body content, and navigation. In Figma, this process includes:

    i) Setting Up the Grid and Layout System
    Grids: Use grids to maintain consistent alignment and spacing. A typical web design grid system is based on a 12-column grid, but Figma allows you to customize your own grid system.
    Auto Layout: Figma’s Auto Layout feature is ideal for creating responsive designs. It automatically adjusts the spacing between elements and adapts to different screen sizes.
    Constraints: Use constraints to pin elements to certain parts of the frame (top, bottom, left, right). This is especially useful for responsive design.

    ii) Building Components
    Reusable Components: Figma allows you to create components like buttons, forms, or navigation bars that can be reused across multiple pages. When you update the master component, changes are reflected across all instances.
    Variants: Create different versions (variants) of a component, such as a button with primary and secondary styles, or different hover states.

    iii) Typography and Color Scheme
    Typography: Choose and define typography early on. Figma supports Google Fonts and allows you to import custom fonts. Use consistent font sizes for headers, body text, and other elements.
    Color Styles: Set up color styles in Figma to create a consistent look throughout the design. Figma’s styles allow you to manage your color palette easily and apply changes globally.
    White Space: Proper use of white space improves readability and makes the website visually appealing.

    d) Prototyping and Interactions
    Figma includes built-in prototyping tools that allow you to simulate website interactions and navigation without leaving the platform.

    i) Adding Links Between Frames
    Connect UI elements (like buttons and menu items) to other pages or sections using Figma’s prototype tool. This will enable you to simulate the website’s user flow.
    Interactive States: Figma supports hover states, on-click interactions, and transitions between frames. These micro-interactions are critical in making the design more engaging and realistic.

    ii) Animation
    Smart Animate: Use Figma’s Smart Animate feature to create smooth animations and transitions between frames. For instance, animating a button’s hover state or transitioning from one page to another can improve the user experience.

    iii) Testing the Prototype
    Share the Prototype: Figma lets you share the prototype with stakeholders or team members by providing a link. They can interact with the design and provide feedback.
    Feedback: Gather feedback through comments, which can be added directly on the design. This real-time collaboration feature ensures that everyone stays aligned.

      Let's Connect! How can we assist you today?


      Allowed Type(s): .png, .jpg, .jpeg .pdf, .doc, .docx


      What is an API?
      An Application Programming Interface (API) is a set of rules and protocols that allow one piece of software to communicate with another. APIs define methods for requests and responses between clients and servers, enabling developers to interact with a system’s data or functionality programmatically.

      APIs are essential for integrating different systems, enabling third-party services, and creating a seamless exchange of data across platforms.

      Types of APIs
      REST (Representational State Transfer): A stateless, scalable API using standard HTTP methods (GET, POST, PUT, DELETE).
      GraphQL: A query language for APIs that allows clients to request exactly the data they need.
      SOAP (Simple Object Access Protocol): A protocol that uses XML for messaging, typically seen in legacy systems.
      WebSocket APIs: For real-time, two-way interactive communication between a client and server.
      RPC (Remote Procedure Call): Executes a function or method on a different server or system.

      Core Features of API Development
      Endpoints: APIs expose endpoints, which are specific routes in the API where requests are sent to retrieve or send data.
      Authentication and Authorization: APIs often require security mechanisms like OAuth2, JWT (JSON Web Token), or API Keys to control access.
      Rate Limiting: Prevents abuse of the API by limiting the number of requests from a single user or IP address.
      Documentation: Good APIs come with comprehensive documentation (e.g., via tools like Swagger) that describes all available endpoints, request methods, parameters, and sample responses.
      Versioning: APIs evolve over time, and versioning ensures backward compatibility with older clients.

      Steps in API Development
      a) Define API Requirements
      Determine the purpose of the API and what functionality or data it will expose. Key considerations:

      What will the API enable?
      Who will be using it (internal developers, third parties)?
      What data formats will be used (e.g., JSON, XML)?
      b) Design API Architecture
      REST API: Design routes that map to CRUD operations (Create, Read, Update, Delete).
      GraphQL API: Define a schema for the types and relationships in the API.
      c) Develop API Endpoints
      For REST APIs, create routes for each resource, such as /users, /products, etc.
      For GraphQL, build query and mutation resolvers that fetch and modify data.
      d) Secure the API
      Implement authentication (OAuth2, API keys) and ensure that data is securely transmitted (use HTTPS). Also, apply permissions and roles where needed to control access to sensitive data.
      e) Test the API
      Test for functionality, security, and performance:
      Postman and Swagger are popular tools for API testing.
      Test edge cases, large data sets, and potential security vulnerabilities.
      f) Document the API
      Create detailed API documentation to help developers understand how to use the API. Tools like Swagger automatically generate API documentation from your code.

        Let’s Connect! How can we assist you today?


        Allowed Type(s): .png, .jpg, .jpeg .pdf, .doc, .docx


        Learning Management System (LMS) development refers to the creation of software platforms that manage the administration, documentation, tracking, reporting, automation, and delivery of educational courses, training programs, or learning and development programs. These systems are used by educational institutions, businesses, and training centers to provide online education and training. LMS development can be complex and involves various components such as user management, content creation, assessments, analytics, and more.

        Here’s a detailed overview of LMS development:

        1. What is an LMS?
        An LMS is a software application or web-based platform that allows educational institutions, businesses, and other organizations to deliver online learning materials, track progress, and manage educational content. LMSs are used for a variety of learning activities, such as:

        E-learning: Delivering courses, certifications, and training via the internet.
        Corporate training: Providing employee training and development programs.
        Blended learning: Combining online digital media with traditional classroom methods.
        Compliance training: Ensuring employees complete mandatory training.
        Popular LMS platforms include Moodle, LearnDash, Blackboard, TalentLMS, and Docebo.

        2. Core Features of an LMS
        a) Course Creation and Management
        Content Management: The core of any LMS is its ability to manage different types of educational content, such as text, images, videos, quizzes, and other multimedia elements. LMS platforms usually support SCORM (Sharable Content Object Reference Model) and Tin Can API (xAPI) for standardizing e-learning content.
        Course Builder: Allows instructors or admins to create structured courses, including lessons, modules, and units. Course builders may use drag-and-drop interfaces to simplify content creation.
        Course Categorization: Organizes courses into categories or subjects, making it easier for learners to find relevant content.

        b) User Management
        User Roles: LMS platforms typically support multiple user roles such as administrator, instructor, student, and guest. Each role has specific permissions to access and manage different parts of the system.
        Enrollment Management: Administrators can enroll users manually or allow users to self-enroll in courses. Automated enrollment options might be available, such as enrolling users after payment or based on predefined rules.
        User Profiles: Learners have personalized profiles showing their progress, course history, grades, certifications, and other relevant information.

        c) Assessment and Certification
        Quizzes and Exams: LMS systems include tools to create quizzes, exams, and other assessments. Different question types such as multiple-choice, true/false, short answer, and matching are supported. Some LMS platforms also allow randomization of questions to prevent cheating.
        Assignment Submissions: Learners can submit assignments for grading, which instructors can review, grade, and provide feedback on.
        Certificates: Upon course completion, the LMS can automatically generate certificates or badges for learners, verifying their achievement.

        d) Tracking and Reporting
        Progress Tracking: LMS platforms track learners’ progress through the course, including their completion status, time spent on different modules, and quiz scores.
        Reporting Tools: Administrators and instructors can access detailed reports on course enrollment, completion rates, learner performance, and other metrics. Reporting features may also include dashboards with visual data to help track trends.
        Learner Analytics: Advanced LMS platforms incorporate data analytics to provide insights into learner engagement, progress, and outcomes. Predictive analytics can also identify learners at risk of failing or dropping out.

        e) Communication Tools
        Discussion Forums: Learners and instructors can interact in forums to discuss course topics, ask questions, and provide feedback.
        Chat and Messaging: LMS platforms often include real-time messaging features or chat rooms for learners to interact with instructors or other students.
        Announcements and Notifications: Admins can send announcements or notifications to inform learners about important course updates, deadlines, or events.

        f) Gamification
        Points and Badges: LMS systems often incorporate gamification elements to increase learner engagement and motivation. Points are awarded for completing tasks, and badges are earned for reaching specific milestones.
        Leaderboards: Leaderboards rank learners based on their performance, promoting healthy competition and motivation.
        Achievements: Completing courses or achieving high scores can unlock achievements or rewards.

        g) Mobile Learning
        Responsive Design: Most modern LMS platforms are designed to work across various devices (desktops, tablets, and smartphones) to provide seamless access to learning content anywhere, anytime.
        Mobile Apps: Some LMS platforms also offer dedicated mobile apps for learners to access content, track progress, and complete assessments on the go.

        3. Types of LMS
        a) Cloud-Based (SaaS) LMS
        Hosted in the Cloud: These LMS platforms are hosted by a third party and accessed via the internet. Popular examples include TalentLMS, Docebo, and Google Classroom.
        Subscription-Based: Users typically pay a monthly or annual subscription fee for access.
        Scalability and Flexibility: Cloud-based LMS platforms are highly scalable and often include regular updates and support from the provider.

        b) Self-Hosted LMS
        Installed on Private Servers: Self-hosted LMS platforms like Moodle and Chamilo are installed on the organization’s servers, giving complete control over the platform.
        Customization: Self-hosted LMSs are highly customizable, allowing organizations to tailor the platform to their specific needs. However, they require more technical expertise for setup and maintenance.
        One-Time Cost: Usually, self-hosted LMS platforms come with a one-time cost (or open-source options) but require ongoing server and IT maintenance.

        c) Open-Source LMS
        Community-Driven: Open-source LMS platforms like Moodle, Open edX, and Canvas are developed and maintained by a community of developers.
        Free to Use: These LMS platforms are generally free to download and use, though there may be costs associated with hosting, customization, and support.
        Customizable: Open-source platforms offer extensive customization, allowing organizations to develop their own features and integrations.

        d) Corporate LMS
        Focus on Employee Training: Corporate LMS platforms like SAP Litmos and TalentLMS are tailored to meet the specific needs of companies providing employee training and development.
        Compliance Training: Corporate LMS systems often include features for compliance tracking, certifications, and mandatory training programs.
        Integration with HR Systems: Many corporate LMS platforms integrate with human resource management systems (HRMS) to track employee learning and performance.

        4. Steps in LMS Development
        a) Requirements Gathering
        Identifying Objectives: The first step in LMS development is identifying the educational or training goals. This includes understanding the type of content, target audience, and the learning outcomes expected.
        User Roles and Permissions: Define the different user roles in the system (admin, instructor, student) and their associated permissions.
        Feature Set: Decide on the essential features, such as course creation, user management, assessment tools, progress tracking, communication tools, and integration needs.

        b) Platform Selection
        Choosing the LMS Type: Decide whether to go with a cloud-based, self-hosted, or open-source LMS. Each option has its pros and cons, depending on the organization’s needs, budget, and technical expertise.
        Technology Stack: For custom LMS development, choose the technology stack (such as PHP, Python, or Ruby on Rails for backend development, and React or Vue.js for frontend development). Open-source LMS platforms like Moodle are typically built on PHP and MySQL.

        c) UI/UX Design
        User-Friendly Interface: The user interface (UI) should be intuitive and easy to navigate, with a focus on providing a seamless experience for learners, instructors, and administrators.
        Responsive Design: Ensure that the LMS is accessible on various devices, especially smartphones and tablets, to accommodate mobile learners.
        Custom Branding: For organizations, the LMS should be customizable to align with branding, including logos, color schemes, and visual elements.

        d) Backend Development
        Content Management System: Develop a robust content management system that allows administrators and instructors to upload and organize learning materials such as videos, documents, quizzes, and assignments.
        User Authentication and Security: Implement strong security protocols, including user authentication (OAuth, SSO, etc.), data encryption, and role-based access control to ensure sensitive data is protected.
        Learning Pathways: Build functionality to create learning pathways or curricula that guide learners through a series of courses based on prerequisites or course hierarchies.

        e) Frontend Development
        Course Interface: The course interface should allow learners to access content, track progress, take quizzes, and submit assignments. It should be intuitive and user-friendly.
        Gamification: Implementing gamification features like badges, points, and leaderboards can improve engagement and motivation.
        Real-Time Communication: Integrate real-time communication tools like chat, discussion forums, and video conferencing for better interaction between learners and instructors.

        f) Testing
        Quality Assurance: The LMS should undergo rigorous testing to ensure it performs as expected. This includes functionality testing, usability testing, and performance testing.
        Scalability and Performance: Ensure that the LMS can handle large numbers of concurrent users without crashing or lagging, especially during peak times.

          Let's Connect! How can we assist you today?


          Allowed Type(s): .png, .jpg, .jpeg .pdf, .doc, .docx


          BuddyBoss is a powerful WordPress-based platform designed for creating and managing online communities, membership sites, and e-learning platforms. It is a popular choice for businesses, educators, influencers, and organizations looking to build social platforms where users can interact, share content, and engage in community activities. BuddyBoss provides all the essential tools for building engaging and collaborative environments while leveraging WordPress’s flexibility and ease of use.

          Here’s a detailed overview of BuddyBoss:

          1. What is BuddyBoss?
          BuddyBoss is a WordPress theme and plugin suite that extends the core functionalities of WordPress and integrates social networking, learning management, membership features, and community-building tools. BuddyBoss is built on top of BuddyPress, which is an open-source plugin for WordPress that adds social networking features to WordPress websites. BuddyBoss improves on BuddyPress by providing advanced customization options, better design, and additional integrations.

          The platform is ideal for creating:

          Social networks: Communities where members can interact, share updates, messages, and multimedia.
          Membership sites: Sites where users can join and pay for exclusive content or features.
          Online courses (LMS): E-learning platforms for delivering courses and learning content with social learning features.
          Discussion forums: Interactive platforms where users can engage in discussions.
          Job boards: Networks where users can post and apply for job opportunities.
          2. Key Features of BuddyBoss

          a) Community Building and Social Networking
          BuddyBoss provides a full suite of tools to create and manage an interactive online community. Features include:

          User Profiles: Each member of the community can have a customizable profile with avatars, cover images, and additional fields.
          Activity Feeds: Real-time activity streams allow users to post updates, like, comment, and share content.
          Private Messaging: Users can send direct messages to one another, creating a more personal interaction within the community.
          Friend Connections: BuddyBoss allows users to build their own network of friends within the community, enhancing engagement.
          Groups: Members can create or join groups centered around specific topics, interests, or activities. Groups can be public, private, or hidden.
          Notifications: Real-time notifications keep users informed about friend requests, messages, and group activities.
          Social Sharing: Users can share content from within the platform to their external social media networks.
          b) Learning Management System (LMS) Integration
          BuddyBoss is designed to integrate with LMS plugins like LearnDash to build robust online learning environments.

          Course Creation: Instructors can create courses with multimedia content (videos, quizzes, assignments).
          Lesson Management: Courses are broken down into lessons, which can be scheduled, monitored, and completed by students.
          Gamification: Features like badges, points, and leaderboards are available to motivate learners.
          Social Learning: BuddyBoss allows learners to interact with each other through course discussion forums, groups, and messaging.
          Certificates and Quizzes: Students can be awarded certificates after completing courses or modules, and quizzes can be integrated to test knowledge.
          c) Membership and Monetization
          BuddyBoss allows you to monetize your community or content through membership options.

          Paid Memberships: Integrations with membership plugins like Paid Memberships Pro or MemberPress allow you to charge users for joining, accessing premium content, or receiving exclusive benefits.
          Subscription Models: Create recurring or one-time payment plans for users, offering different levels of access or membership.
          WooCommerce Integration: BuddyBoss integrates with WooCommerce, allowing you to sell products, courses, or digital downloads directly from your website.
          d) Discussion Forums
          BuddyBoss integrates with bbPress, a popular forum plugin, to create robust discussion boards.

          Discussion Threads: Users can participate in threaded discussions, post replies, and interact with other users in forums.
          Forum Management: Admins and moderators can manage forums, user access, and permissions.
          Group Forums: Groups in BuddyBoss can have their own dedicated forums, making it easier to keep discussions organized by topic or interest.
          e) Mobile App Integration
          One of BuddyBoss’s standout features is the ability to integrate with their mobile app service, allowing you to create a branded mobile app for your community. Key mobile features include:

          Native iOS and Android Apps: Users can interact with your platform via a mobile app, increasing engagement and accessibility.
          Push Notifications: Real-time notifications on mobile devices keep users engaged with your platform.
          Custom Branding: The mobile app can be fully customized with your branding, colors, and logos.
          App Store Submission: BuddyBoss handles the submission of your app to both the Apple App Store and Google Play Store.
          f) Event and Webinar Management
          BuddyBoss allows you to host and manage events, both virtual and in-person.

          Event Creation: Users or admins can create events, set schedules, and invite users.
          RSVP and Attendance Tracking: Users can RSVP to events, and admins can track attendance.
          Event Integrations: Integrate with services like Zoom for hosting webinars and online events directly from the platform.
          g) Customizable Design and Layouts
          BuddyBoss offers a highly customizable platform, with flexible design options that allow you to modify the look and feel of your site without needing to write code.

          Drag-and-Drop Page Builder: BuddyBoss integrates with popular page builders like Elementor, allowing you to easily create custom layouts and designs for your community.
          Theme Customizer: You can adjust colors, fonts, and layouts directly from the WordPress customizer to match your brand’s aesthetics.
          Advanced Customization: Developers can further customize BuddyBoss via child themes or custom code, leveraging WordPress’s extensibility.
          h) Multi-Language Support
          BuddyBoss supports multiple languages and is translation-ready, allowing you to create a global community. This makes it ideal for international platforms where members may speak different languages.

          3. BuddyBoss for Different Use Cases

          a) Online Communities
          BuddyBoss is often used to create niche social networks or communities, allowing members to connect, share ideas, and build relationships. This is ideal for influencers, brands, or companies looking to foster engagement in specific industries or hobbies.

          b) E-Learning Platforms
          Educators and course creators use BuddyBoss alongside LearnDash to create comprehensive online courses with integrated social learning features. Students can interact with each other, participate in forums, and join study groups.

          c) Membership Sites
          For content creators or businesses that provide premium content (videos, articles, or downloads), BuddyBoss can be used to create gated membership sites. Users can subscribe and access exclusive content while also interacting with other members.

          d) Corporate Training and Intranets
          Companies use BuddyBoss for internal employee training, collaboration, and communication. BuddyBoss allows organizations to create private groups, host courses, and track employee progress through LMS integrations.

          e) Non-Profit Organizations
          Non-profits and charitable organizations can use BuddyBoss to create a community platform for volunteers, members, and supporters to interact, share updates, and engage in discussion.

            Let's Connect! How can we assist you today?


            Allowed Type(s): .png, .jpg, .jpeg .pdf, .doc, .docx


            Empower Your Business with Customized CRM Solutions With Leading CRM Development Company

            Customer Relationship Management (CRM) is a technology that allows you to manage all of your company’s relationships and interactions with current and prospective customers. The goal is straightforward: to strengthen business relationships. A CRM system assists businesses in staying connected to customers, streamlining processes, and increasing profitability.

            Why does CRM matter to your business?

            According to Gartner, CRM will be the single largest revenue area of spending in enterprise software by 2021. If you want your company to last, you must have a long-term strategy. You have sales goals, business objectives, and profitability targets. However, getting up-to-date, trustworthy information on your progress can be difficult. How do you turn the influx of data from sales, customer service, marketing, and social media monitoring into actionable business intelligence?

            A CRM system can provide you with a comprehensive view of your customers. Everything is in one place — a simple, customizable dashboard that displays a customer’s previous history with you, the status of their orders, any outstanding customer service issues, and more. You can get a free Consultation.

            Choose the Right CRM ?

            How To Choose the Right CRM ?
            Customer relationship management software is a must-have for modern businesses. Regardless of industry or niche, such software can help your company maximise profits. But if you want to take full advantage of the power of CRM software, you need to know how to choose the right CRM for your organisation’s needs.

            Better customer service 
            Your marketing and salespeople will be better able to meet the individual or collective needs of single customers or entire target audiences if you manage your contacts and collect important customer information.

            Streamline sales processes
            It assists you in increasing your sales. Many CRM tools enable you to streamline sales processes, automate specific tasks, and analyse sales data to improve marketing effectiveness.

            Increases customer retention
            Improved customer retention allows your company to make more money in the long run while spending less on acquiring new customers.

            Provides in-depth analytics.
            CRM software contextualizes critical consumer data and provides you with the statistical and data-driven tools you need to not only survive but thrive in the modern economy.

            Custom CRM software for an organization is no less than a blessing. Save your time and money using your own CRM. Get those insights that no one can tell you. Codingcafe ranks first when it comes to developing custom CRM software solutions. Our happy clients is the live example and awards for us.

              Let’s Connect! How can we assist you today?


              Allowed Type(s): .png, .jpg, .jpeg .pdf, .doc, .docx


              Why Choose Team CodingCafe?

              We understand the value of every penny spend and that’s why we always work under budget so that our client feels relaxed while working with us. Cost efficiency is a critical factor when it comes to website development, as it ensures that the development process is streamlined and within budget. Cost-efficient website development involves finding ways to minimize expenses while still delivering a high-quality website that meets the client’s needs. One effective way to achieve cost efficiency in website development is to use open-source content management systems (CMS) such as WordPress or Drupal. These CMS platforms are free to use and offer a wide range of templates, plugins, and modules that can be customized to fit the client’s specific needs. Another approach to cost-efficient website development is to use pre-built website themes or templates that can be easily customized to the client’s requirements. This saves time and effort that would otherwise be spent on coding and design work from scratch. Outsourcing website development to offshore companies or freelancers can also be a cost-efficient option. This is because developers in countries with lower labor costs can offer their services at a fraction of the cost of developers in developed countries, without sacrificing quality. Finally, adopting an agile development methodology can help increase cost efficiency by allowing developers to iterate and adjust the website’s features and design as they go, thereby minimizing the need for expensive rework. In conclusion, cost-efficient website development involves utilizing cost-saving strategies such as open-source CMS platforms, pre-built templates, offshore outsourcing, and agile development methodologies, to deliver high-quality websites while staying within budget.

              We are people who think out of the box and create what has never been created before ever. The creative team at CodingCafe is a group of talented and experienced professionals who are passionate about designing and developing innovative solutions for their clients. The team is made up of designers, developers, project managers, and other creative professionals who work together to create high-quality products that meet the needs of their clients. One of the key strengths of the creative team at CodingCafe is their ability to work collaboratively. The team members bring a diverse set of skills and experiences to the table, and they work closely with one another to ensure that each project is a success. They use agile development methodologies to ensure that projects are completed on time and on budget, and they are always looking for ways to improve their processes and deliverables. The creative team at CodingCafe is also highly skilled in the latest design and development technologies. They are experts in a wide range of programming languages, including JavaScript, Python, PHP, and Ruby, and they have experience working with popular content management systems such as WordPress, Drupal, and Joomla. They also have experience working with a variety of design tools, including Adobe Creative Suite, Sketch, and Figma. In addition to their technical skills, the creative team at CodingCafe is also highly creative and innovative. They are always looking for new and creative ways to solve problems and deliver solutions that exceed their clients’ expectations. They are committed to staying up-to-date with the latest design and development trends and technologies, and they are always looking for ways to incorporate these into their work. Overall, the creative team at CodingCafe is a highly skilled and talented group of professionals who are committed to delivering high-quality solutions for their clients. They bring a wealth of experience and expertise to each project, and they are always looking for ways to push the boundaries of what is possible in design and development. Whether you are looking for a new website, an innovative mobile app, or a custom software solution, the creative team at CodingCafe has the skills and expertise to help you achieve your goals.

              With the time of over 10+ years we found the best methodologies to identify the proper ingredients we need to master performance and excellence. CodingCafe is a renowned website development agency that has been providing top-notch web solutions to clients all around the world for more than a decade. With their experience and expertise, they have built a solid reputation as a leading website development agency in the industry. The agency’s team of skilled developers, designers, and project managers work together to deliver exceptional web solutions to their clients. They offer a wide range of services including website development, custom web application development, e-commerce solutions, mobile application development, digital marketing, and more. CodingCafe’s website development services are built with the latest technologies and best practices, ensuring that their clients receive high-quality, responsive, and secure websites that meet their unique business needs. They use popular CMS platforms like WordPress, Drupal, and Joomla, as well as frameworks like Laravel and CodeIgniter for custom web application development. The agency’s e-commerce solutions are designed to help businesses of all sizes grow and succeed online. From custom shopping carts to third-party integrations, CodingCafe’s e-commerce development team can create a tailored solution that meets the unique needs of their clients. CodingCafe’s mobile application development services are geared towards businesses looking to expand their reach to mobile users. They develop native mobile applications for iOS and Android platforms, using the latest mobile development technologies and frameworks. In addition to their development services, CodingCafe also offers digital marketing services, helping businesses to promote their products and services online. Their team of digital marketing experts can create effective marketing campaigns that drive traffic, generate leads, and increase conversions. Overall, CodingCafe is a reliable and experienced website development agency that delivers high-quality web solutions to businesses of all sizes. With their proven track record and commitment to customer satisfaction, clients can trust CodingCafe to help them achieve their online goals.

              CodingCafe is a software development company that prides itself on its ability to deliver high-quality solutions on time. The company has a team of experienced developers who are dedicated to meeting project deadlines and ensuring that their clients are satisfied with the results. CodingCafe’s commitment to timely delivery starts with their project planning process. They work closely with clients to understand their requirements and develop a comprehensive project plan that outlines timelines, milestones, and deliverables. This plan is reviewed regularly throughout the project to ensure that they are on track to meet the agreed-upon deadlines. To ensure that they complete their work on time, CodingCafe employs a range of strategies and techniques. These include agile project management methodologies, which allow them to break down complex projects into smaller, more manageable tasks. They also use advanced project management tools to track progress, identify potential delays, and make adjustments as needed. CodingCafe’s dedication to timely delivery has earned them a reputation as a reliable and trustworthy partner for businesses in various industries. They understand that time is of the essence in today’s fast-paced business environment, and they strive to deliver solutions that meet their clients’ needs quickly and efficiently. In summary, CodingCafe’s ability to complete work on time is a testament to their expertise in software development, their commitment to meeting project deadlines, and their use of effective project management strategies and tools.

              A Team CodingCafe is not a workspace filled with Artificial intelligence that just delivers the product to the client. We understand every bit of it first then their industry category and our client Core requirements and this way we bring the innovative design of your brand.

              Pick the Best CRM Development Services for You

              Custom CRM Software Development

              Tailor-made CRM solutions crafted to precisely fit your business needs, ensuring optimal functionality and efficiency.

              CRM Integration Services

              Seamlessly integrate CRM systems with existing platforms, enhancing data flow and providing a unified view of customer interactions.

              CRM System Migration and Upgrades

              Expertly migrate and upgrade CRM systems, ensuring a smooth transition with minimal disruption to your business operations.

              CRM Consulting and Strategy

              Strategic guidance to optimize CRM implementation, helping businesses derive maximum value from customer relationship management.

              Third-Party CRM API Integration

              Connect third-party applications seamlessly, expanding the capabilities of your CRM system and improving overall workflow.

              CRM Module Development

              Develop specialized modules to enhance CRM functionality, addressing specific business requirements and improving user experience.

              CRM Maintenance and Support

              Provide ongoing support and maintenance services, ensuring the continued smooth operation and efficiency of your CRM system.

              Data Migration and Cleansing for CRM

              Efficiently transfer and clean data for CRM systems, ensuring accuracy and reliability for informed decision-making.

              Automation Solutions for CRM Processes

              Implement automation features to streamline repetitive tasks, saving time and enhancing overall CRM efficiency.


              Portfolio

              Introduction to AI in Web Development

              What is AI?:

              A brief introduction to artificial intelligence and its relevance to web development.

              Benefits of AI:

              How AI can enhance user experience, improve efficiency, and provide better insights.

              AI-Powered Features for Websites

              Chatbots and Virtual Assistants: Implementing AI chatbots for customer support and virtual assistants for personalized user interaction.

              Personalization Engines: Using AI to provide personalized content and product recommendations based on user behavior.

              Voice Search Optimization: Integrating voice search capabilities to enhance user experience.

              Machine Learning Applications

              Predictive Analytics: Using machine learning to predict user behavior, sales trends, and more.

              Recommendation Systems: Implementing recommendation algorithms to suggest products, content, or services.

              Fraud Detection: Utilizing machine learning for identifying and preventing fraudulent activities.

              AI-Driven SEO

              Content Optimization: Using AI to analyze and optimize content for better search engine rankings.

              Keyword Research: Automating keyword research with AI tools to identify high-performing keywords.

              Voice Search SEO: Optimizing for voice search queries using AI insights.

              AI in Action: Showcasing real-world examples of how AI has transformed websites and improved business outcomes.

              Client Success Stories: Highlighting client projects where AI solutions were implemented successfully.


                Let’s Connect! How can we assist you today?


                Allowed Type(s): .png, .jpg, .jpeg .pdf, .doc, .docx


                Elementor is one of the most popular WordPress page builder plugins, designed to allow users to create custom, visually appealing websites with a drag-and-drop interface. It provides a way to build pages without needing to code, offering flexibility in design while maintaining simplicity for beginners and non-technical users. Here’s a detailed breakdown of Elementor and its features:

                1. Overview of Elementor
                Elementor is a front-end visual builder for WordPress, meaning you can design pages live, seeing the changes in real-time without needing to switch between the editor and preview mode. It’s widely used for its ease of use, powerful design capabilities, and its ability to create custom layouts and designs that go beyond what is available with standard WordPress themes.

                Free vs. Pro:
                Elementor comes in both free and Pro versions. The free version includes basic widgets and design capabilities, while Elementor Pro adds advanced features, more design elements, and integration with marketing tools and WooCommerce.
                2. Core Features of Elementor
                Elementor provides a vast array of features for building, customizing, and managing websites.

                a) Drag-and-Drop Interface
                Elementor’s primary feature is its intuitive drag-and-drop interface. You can build complex layouts by simply dragging widgets, text blocks, images, and other elements into place. The interface includes a wide range of design elements that make it easy to build almost any type of page or section.

                b) Widgets and Elements
                Elementor comes with a variety of widgets to add different content types to a page:

                Basic Widgets: Text, headings, images, buttons, videos, dividers, spacers, etc.
                Advanced Widgets: Testimonials, carousels, tabs, accordions, counters, progress bars, and more.
                Pro Widgets (in Elementor Pro): Forms, sliders, pricing tables, countdown timers, login forms, and post grids.
                Custom Widgets: Developers can build custom widgets or install third-party widgets to extend Elementor’s functionality.
                c) Templates and Blocks
                Elementor includes a wide selection of pre-designed templates and blocks that allow you to quickly design entire pages or sections. These can be imported into your site and customized as needed:

                Full Page Templates: Pre-built designs for common website pages (homepages, contact pages, about pages, etc.).
                Blocks: Pre-designed sections such as headers, footers, hero sections, testimonials, calls-to-action, etc.
                You can also save your own designs as templates for reuse later across your site or even export them to use on other websites.

                d) Theme Builder (Pro Feature)
                One of Elementor Pro’s most powerful features is the Theme Builder, which allows you to design and control the entire layout of your WordPress site, not just individual pages:

                Header and Footer: Build custom headers and footers that apply site-wide or on specific pages.
                Single Post Templates: Create templates for single posts, pages, or custom post types.
                Archive Pages: Customize blog archive pages or other types of category/archive layouts.
                WooCommerce Integration: Design custom templates for product pages, shop layouts, and checkout pages when using WooCommerce.
                e) Responsive Design
                Elementor makes it easy to create responsive websites, ensuring that your design works well on all devices, including desktops, tablets, and smartphones:

                Device Preview: You can switch between desktop, tablet, and mobile views directly in the editor.
                Custom Design for Different Devices: Elementor allows you to customize styles and layouts specifically for each device. You can change font sizes, hide elements on certain devices, or adjust column widths depending on the screen size.
                f) Global Widgets and Settings
                With Global Widgets, you can design a widget once (such as a button, form, or pricing table) and reuse it across multiple pages. When you edit the global widget, it updates everywhere it’s used.

                Global Settings allow you to set site-wide styles for typography, colors, and spacing, ensuring consistency throughout the website. Changes made to global settings will instantly apply across all pages that use those settings.

                3. Advanced Features of Elementor Pro
                While the free version of Elementor is robust, Elementor Pro unlocks more advanced features aimed at professional developers and designers:

                a) Popup Builder
                Elementor Pro includes a Popup Builder, which allows you to create custom popups without the need for additional plugins. You can use the same Elementor interface to design:

                Exit intent popups
                Promotional banners
                Subscription forms
                Announcement bars
                You can trigger these popups based on various conditions such as time spent on the site, page views, user behavior, and more.

                b) Form Builder
                Elementor Pro includes a Form Builder widget that allows you to create contact forms, lead capture forms, subscription forms, etc., directly within the page builder. These forms can integrate with popular marketing and CRM tools like Mailchimp, HubSpot, ActiveCampaign, and Zapier.

                c) Dynamic Content
                Elementor Pro allows you to incorporate dynamic content, which is crucial for websites that have blogs, WooCommerce products, or other types of dynamic data. You can pull content directly from WordPress:

                Display blog post titles, dates, authors, and categories dynamically.
                Create WooCommerce product templates that pull in product names, prices, and descriptions dynamically.
                d) Custom CSS
                For advanced users, Elementor Pro allows the addition of custom CSS directly to elements. This is particularly useful for fine-tuning designs that require more granular control.

                4. WooCommerce Integration
                Elementor integrates tightly with WooCommerce, making it easy to build custom eCommerce sites without coding:

                Custom Product Pages: Design product pages with custom layouts, galleries, pricing sections, and calls-to-action.
                Shop Layouts: Customize your WooCommerce shop page, displaying products in grids, lists, or using creative layouts.
                Checkout and Cart Pages: Design custom checkout and cart experiences to improve conversions.
                WooCommerce Widgets: Elementor Pro provides WooCommerce-specific widgets, such as product categories, product titles, price, add-to-cart buttons, and more.
                5. Elementor’s Ecosystem and Add-ons
                The Elementor ecosystem is vast, and many third-party developers have created add-ons that expand its functionality. Some popular third-party Elementor add-ons include:

                Essential Addons for Elementor: Adds a variety of advanced widgets and design elements.
                Ultimate Addons for Elementor: Provides a collection of unique widgets and pre-built templates.
                Crocoblock: Offers dynamic content tools, WooCommerce features, and more powerful widgets for Elementor.
                6. Performance and SEO
                Elementor is optimized for performance, offering features like lazy loading of images and optimized code output. However, since it’s a plugin that adds extra functionality and visual effects, performance can depend on the theme, hosting environment, and how much content is added to the page.

                Elementor is also SEO-friendly, integrating well with popular SEO plugins like Rank Math and Yoast SEO. This ensures that pages built with Elementor follow best practices for search engine optimization, such as using clean code, proper heading structures, and meta data.

                7. Use Cases for Elementor
                Small Business Websites: Build and manage a small business website with minimal technical expertise, thanks to drag-and-drop widgets and templates.
                eCommerce Stores: Customize product pages, checkout flows, and promotional banners for WooCommerce-powered stores.
                Portfolios: Creatives like photographers and designers can showcase their work with custom layouts, galleries, and animations.
                Landing Pages: Quickly create custom landing pages for marketing campaigns, lead capture, or product launches.
                Blogs: Design fully custom blog layouts, archives, and individual posts, making it stand out from default WordPress themes.
                8. Pros and Cons of Elementor
                Pros:
                Ease of Use: The intuitive drag-and-drop interface allows users to design without coding knowledge.
                Real-Time Editing: Changes are made live, so users can see how their site looks instantly.
                Customizability: Wide range of templates, widgets, and design controls make it flexible for almost any type of website.
                Extensive Features: Advanced features like Theme Builder, Popup Builder, and WooCommerce integration set it apart from other page builders.
                Large Community: With a huge user base, there’s a wealth of tutorials, add-ons, and support available.
                Cons:
                Performance: On larger websites or those with many elements, Elementor can occasionally impact performance if not optimized correctly.
                Learning Curve: While it’s beginner-friendly, fully utilizing all features may require some time to learn.
                Pricing: While the free version is robust, some key features (like Theme Builder and advanced widgets) require Elementor Pro, which has an annual cost.
                Conclusion
                Elementor is a versatile page builder that enables users to design professional-quality websites without the need for coding. Its drag-and-drop interface, extensive widget library, and theme-building capabilities make it a popular choice for both beginners and advanced WordPress users. Whether you’re creating simple websites or complex eCommerce stores, Elementor provides the tools to design custom layouts and improve user experience effortlessly.

                  Let's Connect! How can we assist you today?


                  Allowed Type(s): .png, .jpg, .jpeg .pdf, .doc, .docx


                  Welcome to CodingCafe – Your Premier Laravel Development Company in India for Excellence in Digital Solutions

                  Unleash the full potential of your web application with our top-tier Laravel development services. As a leading web development company, we specialize in harnessing the power of Laravel, a PHP web application framework known for its elegance and simplicity. Elevate your digital presence with bespoke solutions tailored to meet your unique business needs.

                  Why Choose Laravel Development at CodingCafe?

                  • Profound Laravel Expertise
                  • Tailored Solutions for Every Business
                  • API Mastery
                  • Performance Optimization
                  • Migration and Upgrade Prowess
                  • Innovative Package Development

                  Transform Your Digital Presence with Laravel

                  Ready to elevate your web experience? Discover the potential of your online presence, your trusted Laravel development partner. Whether you need a stunning website, e-commerce functionality, or custom web applications, we have the expertise to bring your vision to life. Contact CodingCafe today, and let’s embark on a Laravel development journey that defines excellence in web solutions. Your success is our mission!

                    Let’s Connect! How can we assist you today?


                    Allowed Type(s): .png, .jpg, .jpeg .pdf, .doc, .docx


                    Pick the Best Laravel Development Services for You

                    Custom Laravel Web Application Development

                    Crafting bespoke web applications tailored to your specific business needs using the power and flexibility of the Laravel framework.

                    Laravel E-commerce Solutions

                    Building robust and scalable e-commerce platforms with Laravel, ensuring seamless transactions and an enhanced online shopping experience.

                    Laravel API Development and Integration

                    Developing and integrating APIs to enhance the functionality and connectivity of your Laravel web application with third-party services and applications.

                    Laravel Migration and Upgrades

                    Expertly migrating existing web applications to Laravel or upgrading your current Laravel version to ensure optimal performance and security.

                    Laravel Maintenance and Support:

                    Providing ongoing maintenance and support services to ensure the smooth operation, security, and performance of your Laravel web application.

                    Laravel CMS Development

                    Creating content management systems using Laravel for efficient content creation, publishing, and management, tailored to your business requirements.

                    Laravel Performance Optimization

                    Analyzing and optimizing the performance of your Laravel web application to ensure faster load times and a seamless user experience.

                    Laravel Real-time Chat Applications

                    Building interactive and real-time chat applications using Laravel, fostering communication and collaboration within your web platform.

                    Laravel Payment Gateway Integration

                    Seamless integration of secure and reliable payment gateways into your Laravel web application to facilitate smooth and secure transactions.

                    TESTIMONIALS

                    Portfolio

                    React.js is a popular open-source JavaScript library for building user interfaces, primarily used for creating web applications with dynamic, responsive, and fast user interfaces (UI). Developed by Facebook, React has gained widespread adoption due to its efficient rendering, component-based architecture, and robust ecosystem. Here’s a detailed look at React.js:

                    1. What is React.js?

                    React.js (commonly referred to as React) is a front-end JavaScript library used to build UI components. It is primarily used for creating Single Page Applications (SPAs), where only a single HTML page is served to the browser, and the user interacts dynamically with the content without the need for page reloads.

                    Unlike traditional web development approaches that rely on rendering entire pages, React uses a more efficient approach called the Virtual DOM to only update parts of the UI that need changes, making it faster and more scalable.

                    2. Key Features of React.js

                    a) Component-Based Architecture

                    • Components are the building blocks of a React application. Each component represents a part of the user interface, such as buttons, forms, navigation bars, etc.
                    • Components can be reused throughout the application, making development more modular and maintainable. This encourages DRY (Don’t Repeat Yourself) principles.
                    • Components can be stateful (i.e., they manage their own state and respond to user actions) or stateless (i.e., they simply display data passed to them via props).

                    b) Virtual DOM

                    • React uses a Virtual DOM (Document Object Model) to manage updates to the actual DOM. The Virtual DOM is an in-memory representation of the actual DOM elements.
                    • When a user interacts with the UI, React creates a new virtual DOM, compares it with the previous one, and determines the most efficient way to update the real DOM. This process is known as reconciliation.
                    • The Virtual DOM ensures that updates to the real DOM are minimized, resulting in improved performance and faster rendering.

                      Let’s Connect! How can we assist you today?


                      Allowed Type(s): .png, .jpg, .jpeg .pdf, .doc, .docx


                      ×